Accessing University of Manitoba soil testing services takes about three weeks from field sampling to receiving your results, and the process starts with collecting 15 to 20 soil cores from each management zone on your farm. Alberta producers serious about precision water management rely on lab testing to validate their in-field sensors and establish baseline nutrient profiles that directly inform smart irrigation scheduling decisions throughout the growing season.
The University of Manitoba Soil Testing Laboratory provides comprehensive analysis that goes beyond what on-farm moisture probes can measure. While your sensors tell you when to irrigate, lab results reveal the nutrient-holding capacity of your soil, organic matter levels, and texture profiles that determine how quickly water moves through different zones. This combination matters because a field showing identical moisture readings at 30 cm depth might require vastly different irrigation volumes depending on whether you’re working with a sandy loam or heavy clay.
For farmers managing centre pivots or drip systems across variable terrain, soil testing creates the foundation for zone-specific water applications. The data helps you avoid over-irrigating lighter soils that leach nutrients while ensuring heavier areas receive adequate moisture for root development. The process isn’t complicated, but proper sampling technique makes the difference between actionable results and wasted lab fees.
This guide walks you through the complete workflow, from identifying sampling locations and collecting cores to submitting samples and interpreting results within your broader moisture monitoring strategy. You’ll learn exactly what equipment you need, how to avoid contamination, and when to resample as conditions change.
What You’ll Need for U of M Soil Testing
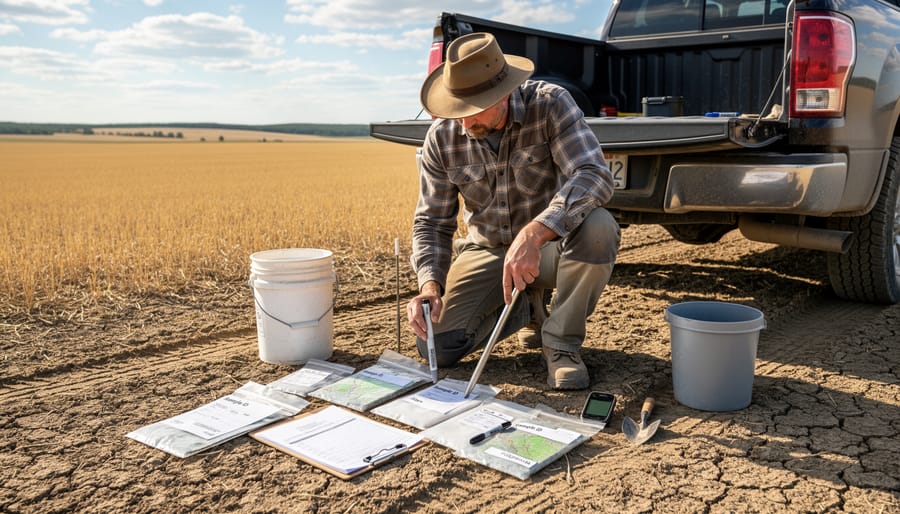
Sampling Equipment
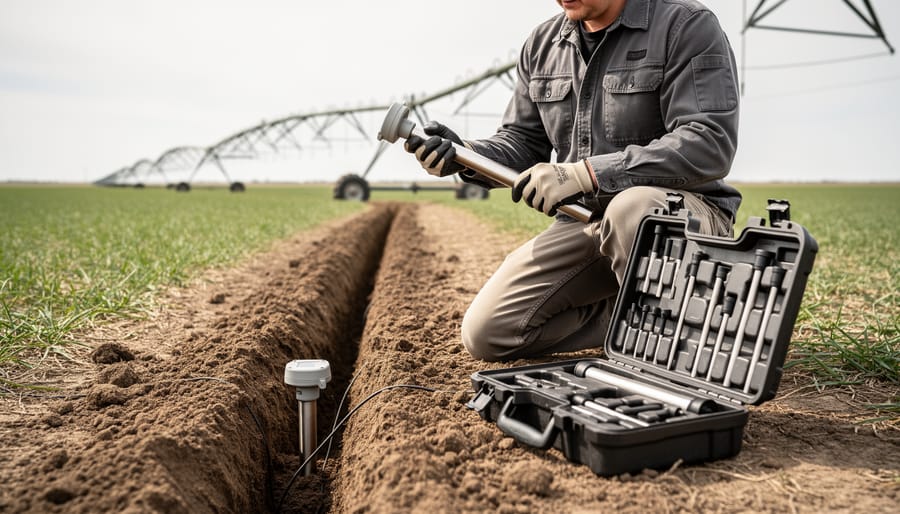
You’ll need a soil probe or auger to extract cores from consistent depths, a stainless steel or chrome-plated probe at least 45 centimetres long works best and minimizes contamination risk. If you don’t own one, many Alberta agricultural suppliers rent them. Bring two or three clean plastic buckets for compositing samples; avoid galvanized metal containers, which can leach zinc and skew nutrient readings.
Pack a supply of heavy-duty, resealable plastic bags (one-litre freezer bags suffice) and waterproof labels or permanent markers to identify each sample immediately after collection. Write the field name, zone, date, and depth directly on the bag with indelible ink, adhesive labels can peel off during transit to Manitoba. You’ll also want a clean trowel or knife for breaking up clods and mixing composite samples in the bucket.
A clipboard with your sampling map and the University of Manitoba submission guidelines and materials keeps you organized in the field. Bring a cooler if soil moisture is high and samples might degrade during a long drive, though most spring and fall samples ship fine at ambient temperature. Finally, disposable gloves prevent hand oils from contaminating samples and make cleanup easier.
Documentation and Information
Before you dig your first sample, gather the paperwork that will ensure your U of M test results are actually useful. The University of Manitoba requires specific documentation that goes beyond just dropping soil in a bag.
You’ll need the official U of M soil testing submission form, available as a downloadable PDF from their agricultural services website. This form asks for your farm location, field history, and the specific tests you’re requesting. For moisture monitoring applications, you’ll want to request texture analysis and organic matter content at minimum, these determine your soil’s water-holding capacity.
Prepare your field history information: what crops you’ve grown in the past three years, fertilizer applications, and any amendments like manure or compost. This background helps lab technicians interpret your results accurately. If you’re testing multiple fields, create a simple map or numbering system before sampling so you can match lab results to specific locations later.
You’ll also need payment information. U of M accepts credit cards or cheques, with costs typically ranging from $25-45 per sample depending on the test package. Keep your confirmation number, it’s your tracking reference for the 7-10 business days until results arrive.
Finally, note your current irrigation system type and any moisture sensors already installed. This context helps you apply test results to your specific monitoring setup.
Safety and Sample Integrity Precautions
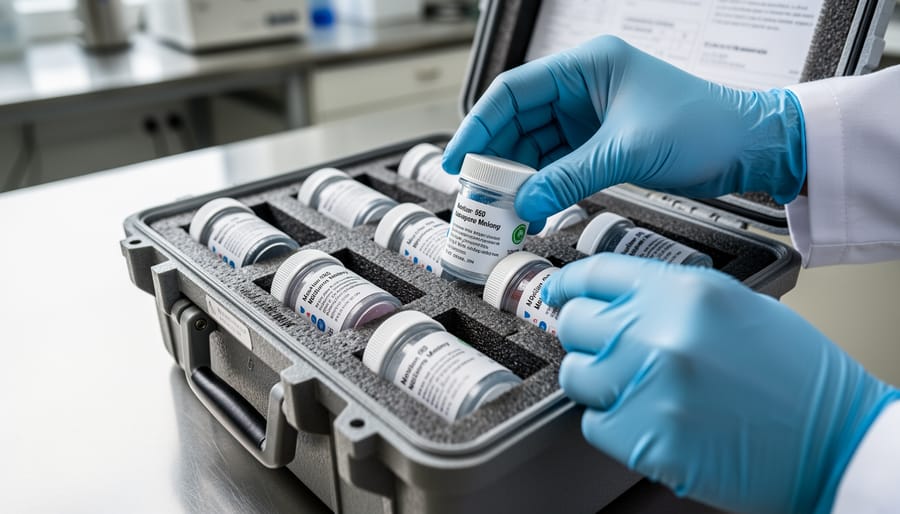
Soil test accuracy depends entirely on sample integrity. Before you touch a spade, understand that contaminated samples waste both your money and the University of Manitoba lab’s resources. Even trace amounts of fertilizer residue, manure, or petroleum products can skew nutrient readings by orders of magnitude, rendering your moisture management decisions meaningless.
Start with clean equipment. Scrub your soil probe, auger, and buckets with plain water between each sampling location. Never use the same tools you’ve handled fertilizer with, and avoid sampling within two metres of fertilizer bands, old manure piles, or equipment fueling areas. These hotspots create false readings that don’t represent your field’s actual conditions.
Timing matters as much as technique. Soil tests taken immediately after fertilizer application or heavy rain give you a snapshot of abnormal conditions, not the baseline data you need for calibrating moisture sensors. Wait at least four weeks after applying fertilizer and avoid sampling when the soil is either saturated or dust-dry. For moisture monitoring applications, aim to sample when soil is at field capacity or slightly below, typically spring before planting or late fall after harvest.
Don’t sample frozen ground. Ice crystals damage soil structure and prevent accurate texture analysis, which directly affects how you interpret water-holding capacity. If you must sample in winter, scrape away snow and thaw the top layer naturally before taking cores.
Keep samples cool during transport. Heat accelerates microbial activity and can alter nitrogen readings within hours.
Step-by-Step: Collecting and Submitting Your Soil Samples
Step 1: Plan Your Sampling Strategy
Start by walking your fields to identify areas that behave differently, patches where crops consistently mature earlier, sections that stay wetter or dry out faster, and zones with varying soil colour or texture. These visible differences signal distinct management zones that should be sampled separately rather than averaging them together. For moisture monitoring, you want samples that reflect where water actually moves and sits in your soil.
Sample depth matters enormously here. Most crops in Alberta pull the majority of their water from the top 60 centimetres of soil, so focus your sampling there. If you’re targeting specific crops with deeper roots, like alfalfa, extend to 90 centimetres to monitor within rooting depth. Take cores at consistent depths: 0-15 cm and 15-60 cm work well for most row crops, giving you both topsoil and subsoil profiles.
Aim for one composite sample per management zone, mixing 10-15 individual cores from across each zone. Timing depends on your goals, fall sampling after harvest captures baseline conditions, while spring sampling before planting shows what moisture you’re starting with. Avoid sampling immediately after heavy rain or during active irrigation.
Step 2: Collect Representative Samples
The key to reliable moisture monitoring data is collecting samples that truly represent your field’s conditions. Start by walking the sampling area in a zigzag or W-pattern, avoiding obvious anomalies like old manure piles, field edges, or low spots unless you’re specifically monitoring those zones.
Push your soil probe straight down to your predetermined depth, typically 6 inches for surface moisture monitoring or up to 24 inches for deeper root zone analysis. Extract the core cleanly, inspecting it for visual uniformity. If you hit rock or a compacted layer that skews the core, discard that sample and take another nearby.
For each management zone, collect 10 to 15 individual cores and place them in your clean bucket. This compositing approach evens out micro-variations in texture and moisture-holding capacity that would throw off your baseline data. Mix the cores thoroughly in the bucket, breaking up any clumps but avoiding excessive handling that changes moisture content.
If your field has visible differences in soil color, texture, or drainage, treat these as separate zones and keep their samples distinct. A heavier clay area and a sandy knoll will have drastically different water-holding capacities, and combining them masks the variations your sensors need to account for.
Take notes on sample locations using GPS coordinates or field landmarks. You’ll need to correlate lab results with sensor placement later, and a quick photo of each sampling area helps jog your memory when reports arrive weeks later.
Step 3: Prepare Samples for Shipment
Once you’ve collected your cores from the field, proper preparation ensures accurate results and prevents sample rejection. Start by thoroughly mixing your composite samples in a clean bucket, break up clumps and blend the soil until it’s uniform. This mixing is crucial because the lab will only test a small portion of what you send.
For standard soil testing, U of M typically requires air-dried samples. Spread your mixed soil on clean newspaper or paper bags in a thin layer (about 1 cm deep) and let it dry at room temperature for 24 to 48 hours. Avoid direct heat sources like furnaces or sunny windowsills, which can alter nutrient readings. The soil should feel dry to the touch and crumble easily. If you’re specifically testing for moisture content or biological activity, contact the lab beforehand, these tests require fresh, undried samples shipped immediately with cold packs.
Label each sample bag clearly with waterproof marker: your name, farm name, field identifier, and sampling date. Double-check that your labels match exactly what you’ve written on your submission form. Place approximately 500 grams (roughly 2 cups) of dried soil in a sealed plastic bag, then put that inside a second bag or sturdy envelope to prevent leaks during transport.
Step 4: Complete Submission Forms
Locating and completing the University of Manitoba submission forms requires attention to detail to ensure your samples are processed correctly. Start by visiting the U of M Soil Testing Lab website to download the current submission form, using an outdated version can delay processing. The form requests basic farm information including your operation name, contact details, and mailing address for results.
In the test selection section, specify tests relevant to moisture management. Request a complete soil texture analysis, which reveals your soil’s sand-silt-clay percentages and directly determines water-holding capacity. Add organic matter testing, as it significantly affects moisture retention. For fields with drainage concerns, include electrical conductivity (salinity) testing since salt accumulation impacts water movement and availability.
Provide accurate GPS coordinates or legal land descriptions for each sample location. This allows you to match lab results with specific field zones in your precision agriculture software. Note your intended crop and any recent amendments applied, limestone or manure applications affect soil chemistry and should be recorded.
In the “additional information” section, mention if samples are specifically for irrigation planning. Some labs offer interpretation notes tailored to moisture monitoring when they know your intended use.
Step 5: Ship and Track Your Samples
Pack your labeled samples in a sturdy box with cushioning material, crumpled newspaper or bubble wrap, to prevent shifting during transport. Keep the box small enough that samples don’t bounce around, but large enough to avoid crushing individual bags. Include your completed submission forms inside the box, placed in a sealed plastic sleeve to protect them from moisture.
For shipping from Alberta to Manitoba, Purolator and Canada Post both offer reliable service to the University of Manitoba. Standard ground shipping typically takes three to five business days and costs between $20 and $35 depending on box weight and your farm’s location. Choose a service that provides tracking numbers. Avoid shipping on Thursdays or Fridays so samples don’t sit in transit over the weekend.
The U of M Soil Testing Laboratory usually confirms receipt within one to two business days of delivery. If you don’t receive an email confirmation, call the lab directly at 204-474-8153 with your tracking number. Keep a photo of your submission forms and sample labels as backup documentation. Most test results arrive within seven to ten business days after the lab receives your samples.
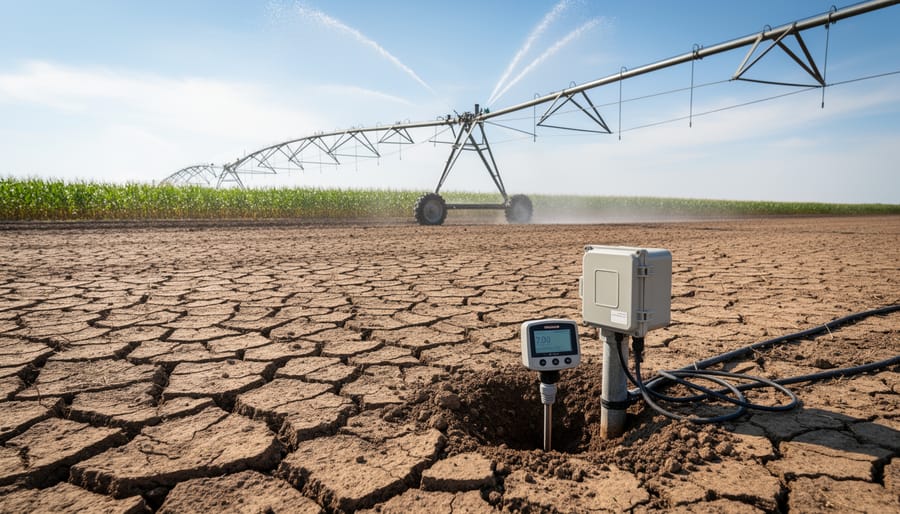
Understanding Your U of M Test Results
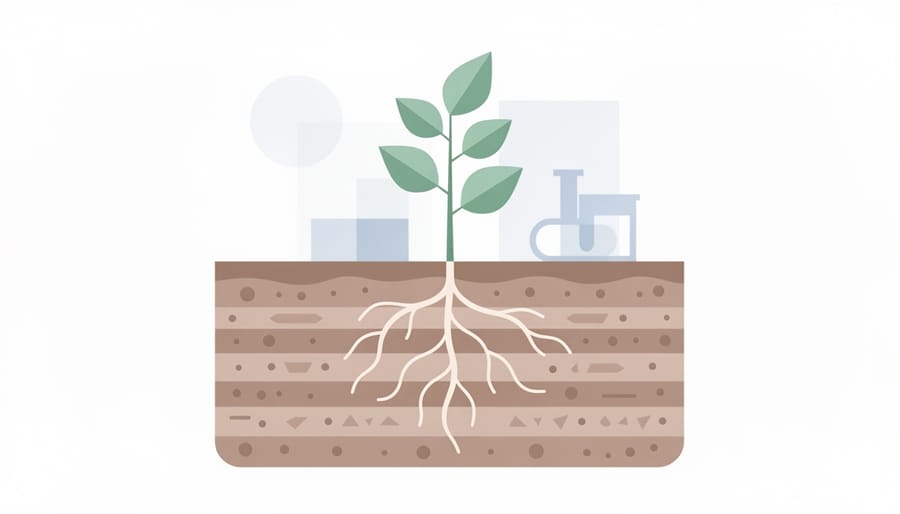
Your U of M soil test report arrives packed with data, but for moisture monitoring, three sections matter most: soil texture analysis, organic matter content, and the derived water-holding capacity calculations. These foundational metrics tell you how much water your soil can actually store and how quickly it moves through different depths, which directly shapes your irrigation scheduling and sensor calibration decisions.
Start with the texture analysis section, which breaks down your soil into sand, silt, and clay percentages. A soil with 40% sand, 35% silt, and 25% clay (a loam) behaves completely differently from one with 70% sand and minimal clay (a sandy loam). The clay fraction holds water tightly while sand drains quickly, so your field’s specific texture mix determines both total storage capacity and how fast moisture moves between sensor depths. If you’re working with R-Value soils common across Alberta, texture analysis reveals whether you’re managing a high-capacity clay loam or a fast-draining sandy zone that needs more frequent but lighter applications.
The organic matter percentage, typically listed near texture data, boosts water-holding capacity beyond what texture alone predicts. Each 1% increase in organic matter can hold an additional 15,000 to 20,000 litres of plant-available water per hectare in the top 15 centimetres. Fields testing at 4% organic matter store significantly more moisture than those at 2%, even with identical texture, which changes your deficit triggers and refill targets.
Look for the available water capacity (AWC) figure, usually expressed in millimetres per 30 centimetres of soil or as a percentage by volume. This calculated value combines texture and organic matter into a single moisture storage number. A soil with 25 mm AWC per 30 cm depth can hold roughly 25 mm of plant-available water in that zone before reaching stress levels, which translates directly to how you set irrigation thresholds on your sensors and how many days between waterings your crops can handle during peak demand.
Verification and Next Steps After Testing
When your U of M test results arrive, typically within two to three weeks, your first task is confirming they make sense for your farm. Cross-reference the reported soil texture against what you observe in the field. If the lab identifies a clay loam but you’re working sandy ground, contact U of M’s soil lab directly to verify the sample wasn’t mislabeled or contaminated during processing. Check that all requested tests appear on the report and that moisture-related metrics like water-holding capacity align with your field experience during wet and dry periods.
Once you’ve confirmed the data is valid, work through these verification and action steps:
- Compare lab texture results to your field observations and any previous soil maps
- Review water-holding capacity values against typical ranges for your soil type
- Identify any unexpected nutrient deficiencies or pH issues that might affect root development and water uptake
- Calculate field capacity and permanent wilting point thresholds for your irrigation triggers
- Mark sampling locations on a field map for future reference and sensor placement
- Share results with your agronomist or irrigation specialist for interpretation
The real value emerges when you integrate these lab findings into your moisture monitoring system. Use the U of M water-holding capacity data to calibrate your soil moisture sensors. Most capacitance and tensiometer systems require site-specific calibration to translate sensor readings into actual volumetric water content. Install sensors in zones that match your sampling locations, this lets you validate sensor readings against known soil properties and adjust irrigation thresholds based on texture-specific field capacity.
Adjust your irrigation scheduling using the lab’s permanent wilting point and field capacity data. A clay soil holding 18% water at field capacity requires different management than sandy loam at 12%. Program these thresholds into your irrigation controller or decision support software so alerts trigger at meaningful soil moisture levels for your specific ground. Plan to resample every three to four years or after significant management changes like deep tillage or manure applications, maintaining a baseline for tracking soil health alongside your real-time monitoring data.
Expert Perspective: Integrating Lab Testing with On-Farm Sensors
Mark Hendrickson, a pulse and cereal producer near Lethbridge, has spent five years refining his moisture monitoring approach by pairing U of M soil testing with field sensor networks. His system combines laboratory precision with real-time data, and the results have reshaped how he manages irrigation across 800 acres.
“The U of M tests gave us something our sensors couldn’t, actual water-holding capacity for each management zone,” Hendrickson explains. “We had soil moisture sensors installed at three depths, but we were guessing at field capacity and wilting point. The lab data let us calibrate those sensors properly.”
His process starts with soil sampling in early spring. He sends cores to U of M for texture analysis and moisture characteristic curves, then uses those values to program his sensor system’s thresholds. The lab report showed his heavier clay loam held 18% available water, while a sandy section topped out at 11%, a difference that meant separate irrigation zones where he’d previously treated the field as uniform.
“Before calibration, I was either over-watering the clay area or under-watering the sand,” he notes. “Now the sensors trigger irrigation at the right soil moisture levels for each zone. We’re using 22% less water than three years ago while maintaining yield.”
Hendrickson retests every three years or after major tillage changes. Between lab tests, his sensors provide daily feedback, but he credits the U of M data with making those sensor readings actionable rather than just interesting numbers on a screen.
Common Questions About U of M Soil Testing for Alberta Farmers
How much does U of M soil testing cost for Alberta farmers?
Basic soil fertility packages from the University of Manitoba typically range from $30 to $50 per sample, with comprehensive analysis including texture and organic matter testing costing $60 to $80. Shipping costs from Alberta add approximately $15 to $25 depending on your location and sample quantity.
What’s the typical turnaround time for results?
Most standard soil tests are processed within 7 to 10 business days during regular seasons, though peak periods in spring and fall can extend this to 14 days. Factor in 3 to 5 days for shipping each way when planning your sample submission timeline.
Can I use Alberta-based labs instead of U of M?
Alberta has several reputable soil testing facilities including provincial labs and private services that may offer faster turnaround and lower shipping costs. However, many Alberta farmers still prefer U of M for specialized moisture-related analysis and established calibration data that aligns with gravimetric testing protocols used in precision agriculture research.
How does U of M testing compare to on-farm sensor data?
Lab testing provides baseline soil characteristics and water-holding capacity that you can’t measure with field sensors alone, while sensors give you real-time moisture readings. The combination works best: use U of M data to calibrate your sensors and understand soil texture, then rely on continuous sensor monitoring to track daily changes and inform irrigation timing based on factors like crop coefficient requirements.
One concern Alberta farmers often raise is whether cross-border sample shipping complicates the process. In practice, soil samples move freely between provinces for agricultural testing purposes without customs issues. Use a courier with tracking, clearly label packages as agricultural soil samples, and include your contact information inside the box. Most farmers bundle multiple field samples in a single shipment to reduce per-sample costs.
If you’re comparing U of M to Alberta options, consider your specific needs. For routine fertility testing, a local Alberta lab may serve you well with quicker results. But if you’re building an advanced moisture monitoring system and want detailed physical analysis, particle size distribution, bulk density, field capacity measurements, U of M’s specialized testing often justifies the extra shipping time. Some farmers split their testing: annual comprehensive analysis through U of M for calibration data, with supplementary nutrient checks through Alberta labs during the season.
U of M soil testing gives you the baseline data your moisture monitoring system needs to deliver accurate, actionable insights. The lab analysis reveals your soil’s water-holding capacity, texture, and structure, numbers that turn raw sensor readings into precise irrigation decisions tailored to your fields.
This isn’t an either-or choice between laboratory testing and field sensors. The most effective approach combines both: use U of M’s detailed analysis to establish your soil’s characteristics, then deploy moisture probes calibrated to those specific conditions. Update your lab testing every three to five years or when you notice changes in field performance, and let your sensors handle the day-to-day monitoring between tests.
Start with one representative field this season. Send samples to U of M, get the data, and use those results to fine-tune your moisture monitoring approach. You’ll see the difference in how confidently you can schedule irrigation and manage water stress.
For ongoing learning about soil health and precision agriculture techniques, Agriculture and Agri-Food Canada’s soil management resources and provincial extension services offer practical guides specific to Prairie conditions. Your regional agronomist can also help you interpret results within the context of Alberta’s climate and cropping systems.