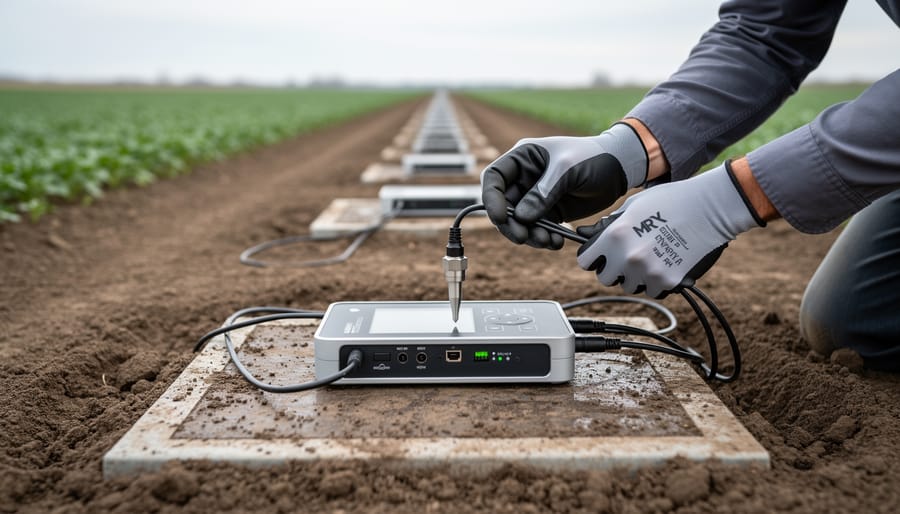
Calibrating an oxygen sensor for agricultural carbon monitoring takes 15 to 30 minutes and requires only a two-point calibration: one at ambient air (20.9% oxygen) and one at zero oxygen using a nitrogen purge or chemical scrubber. Done correctly, this straightforward procedure ensures your soil respiration and greenhouse gas measurements meet third-party verification standards for carbon offset programs.
For Canadian farmers entering the carbon credit marketplace, sensor accuracy isn’t optional. Verifiers routinely audit field data, and poorly calibrated O2 sensors can trigger desk rejections or costly re-sampling. Whether you’re measuring aerobic soil activity for a regenerative ag project in central Alberta or documenting methane oxidation for a manure management protocol, your measurements need to hold up under scrutiny. That means calibration records, drift checks, and quality control steps baked into your MRV plan from day one.
Most modern electrochemical and optical O2 sensors drift over time due to membrane wear, electrolyte depletion, or temperature swings common in Prairie field conditions. A sensor that reads 21.2% in ambient air instead of 20.9% might seem close enough, but that 0.3% error compounds across hundreds of measurements and can skew your carbon flux calculations by several percentage points. Certification bodies know this, which is why calibration logs and pre-season accuracy checks are now standard documentation requirements.
This guide walks you through the complete calibration process: the tools you’ll need, safety protocols for working with calibration gases, step-by-step instructions for both ambient and zero-point calibration, and the QA/QC verification steps that satisfy auditors. You’ll also see how a Manitoba grain operation integrated sensor calibration into their seasonal monitoring workflow and cut their verification costs by catching drift early.
When O2 Sensor Calibration Is Required for MRV Compliance
Understanding when to calibrate your oxygen sensors isn’t optional for carbon credit programs, it’s a compliance requirement. Canadian carbon offset protocols, particularly those aligned with ISO 14064 standards, demand documented calibration records that third-party verifiers will scrutinize during audits. Missing or irregular calibration data can jeopardize your entire certification claim, regardless of how accurate your field work might be.
Pre-deployment calibration is your first checkpoint. Before installing any O2 sensor in a monitoring location, whether that’s a compost windrow, manure storage facility, or soil respiration chamber, you need a baseline calibration record dated within 30 days of deployment. This establishes your sensor’s accuracy from day one and creates the audit trail verifiers expect to see.
Scheduled maintenance intervals form the backbone of MRV-compliant oxygen monitoring. Most Canadian carbon offset protocols require calibration at least quarterly, though monthly checks are becoming standard practice for projects targeting premium credit markets. Agricultural operations running continuous monitoring systems should treat these intervals as non-negotiable appointments, not suggestions. The frequency matters because electrochemical sensors naturally drift over time, and optical sensors can develop membrane fouling in high-moisture farm environments.
Certain conditions trigger immediate recalibration requirements, regardless of your regular schedule:
- Temperature swings exceeding 15°C from the last calibration environment
- Sensor exposure to freezing conditions (common in Alberta winters)
- Physical impacts or drops that may affect internal components
- Readings that drift more than 0.5% from expected ambient values (20.9% O2)
- Any sensor relocation to a different monitoring site
- Extended storage periods longer than 60 days without use
Before any third-party verification audit, conduct a fresh calibration within two weeks of the scheduled verifier visit. This demonstrates active quality control and gives you time to address any sensor issues before stakeholders arrive. Verifiers will check calibration dates against your data submission timestamps, looking for gaps or patterns suggesting neglect. Documented calibration records aren’t just paperwork, they’re the foundation of credible carbon accounting that protects your farm’s investment in environmental monitoring.
Tools and Materials Needed for Field Calibration
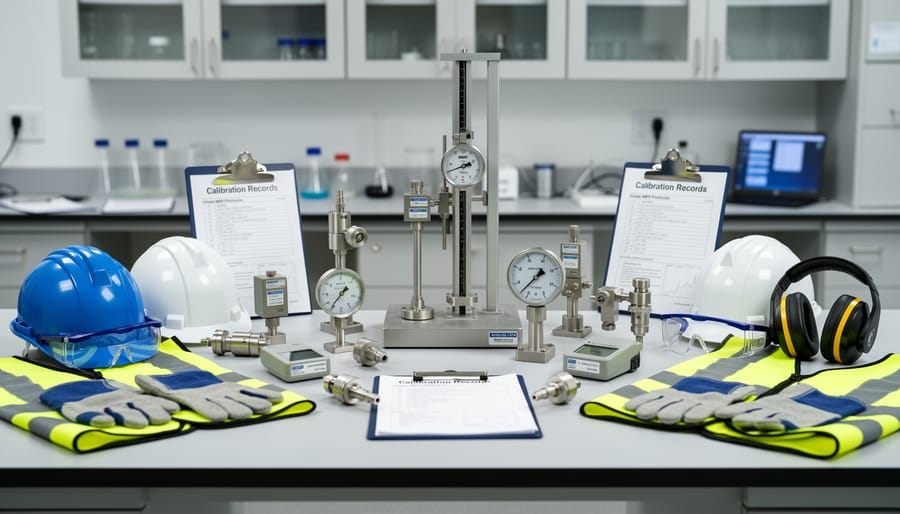
Successful field calibration demands specific equipment that delivers certification-grade accuracy while standing up to farm environments. Here’s what you’ll need to calibrate O2 sensors properly for MRV work.
Calibration Gases
Zero-oxygen gas or high-purity nitrogen (99.99%) serves as your zero-point reference, while ambient air naturally provides the span point at 20.9% oxygen. For critical certification work, purchase certified calibration gas cylinders with traceable certificates showing exact composition. Expect to pay $150-$220 CAD per small cylinder (34L) from Canadian industrial gas suppliers like Praxair or Linde in 2026. A single cylinder handles dozens of calibrations.
Gas Delivery Components
You need a pressure regulator to step cylinder pressure down to workable levels (typically 5-15 PSI) and a flow controller or needle valve to maintain steady gas flow during calibration. Budget $180-$280 CAD for a basic regulator-flowmeter combination. Quality matters here, inconsistent flow causes calibration drift.
Calibration Chamber
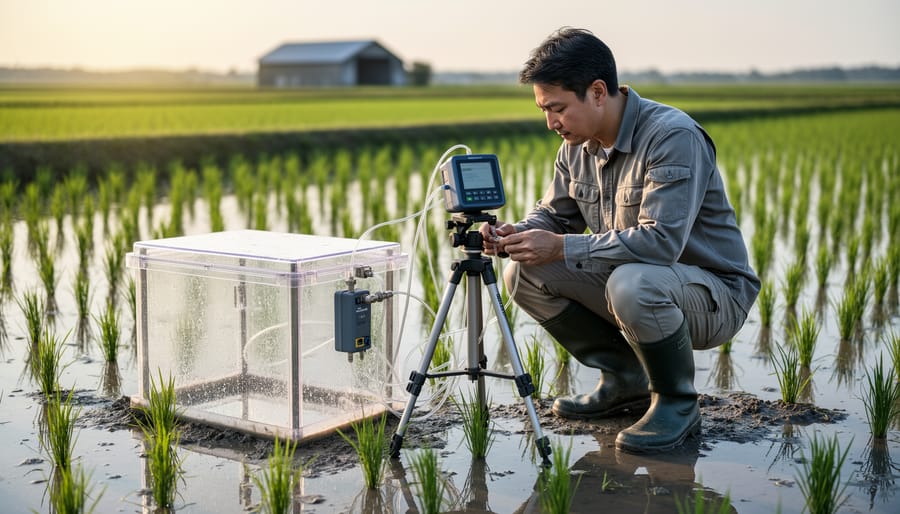
A sealed calibration bag or small chamber isolates your sensor probe in a controlled atmosphere during the procedure. Rigid chambers offer better repeatability but cost $300-$450 CAD, while calibration bags (Tedlar or similar) run $80-$140 and work fine for electrochemical sensors. Some technicians improvise with inverted containers, though this risks ambient air leakage.
Documentation Tools
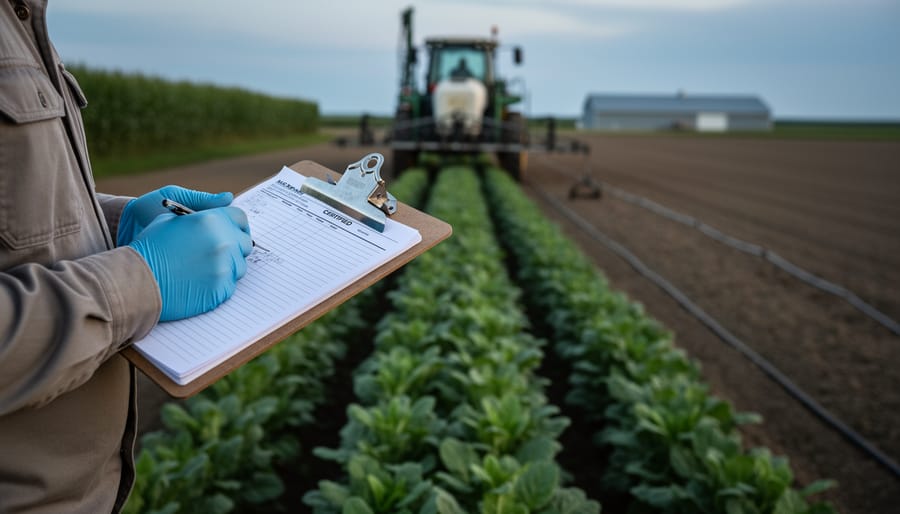
Maintain a dedicated calibration logbook (paper or digital) recording every session’s details: date, technician, serial numbers, pre- and post-calibration readings, gases used, and environmental conditions. Verifiers scrutinize these records during audits. Digital options like calibration management apps provide timestamped entries and photo documentation.
Safety Equipment
Nitrile gloves protect hands from cold gas discharge, safety glasses guard against regulator failures, and a portable oxygen monitor (separate from the sensor you’re calibrating) warns of oxygen-deficient atmospheres in enclosed spaces. The monitor costs $350-$600 CAD but it’s non-negotiable for confined-space work.
Keep your manufacturer’s calibration certificate and sensor manual on hand, they specify acceptable tolerances and procedures unique to your equipment model.
Safety Warnings and Precautions
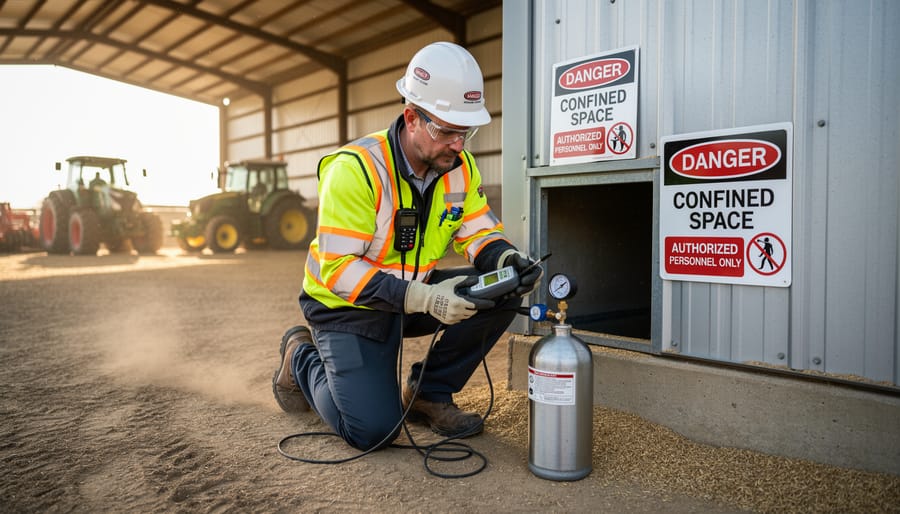
Calibrating oxygen sensors in agricultural settings exposes you to serious hazards that demand your full attention before you touch a gas cylinder or step into a monitoring site. Compressed calibration gases, confined farm structures, and extreme winter conditions all present risks that can turn routine procedures into emergencies if you ignore basic safety protocols.
Handle compressed gas cylinders with care. Nitrogen and zero-oxygen calibration gases displace breathable air rapidly in poorly ventilated areas, creating invisible asphyxiation zones. Secure cylinders upright, transport them on proper carts, and crack valves slowly to avoid damaging regulators. In cold Alberta winters, cylinder valves and regulators can cause cold burns to bare skin, wear insulated gloves when connecting lines.
Work only in well-ventilated locations. If you must calibrate near compost windrows, manure lagoons, or inside treatment buildings, ensure adequate airflow and use a portable gas monitor to track ambient oxygen levels continuously. Canadian occupational health regulations require confined space entry permits and standby personnel for enclosed farm structures; calibration work falls under these rules when oxygen displacement is possible.
Stop immediately if you experience dizziness, headache, rapid breathing, or confusion. These symptoms indicate oxygen deprivation. Move to fresh air and contact emergency services. Similarly, abort calibration if your gas monitor shows oxygen below 19.5 percent or if equipment malfunctions create uncontrolled gas releases. Document any safety incidents in your calibration logbook for future reference and verifier review.
Step-by-Step O2 Sensor Calibration Process
Preparing Your Sensor and Workspace
Before you begin the calibration sequence, give your oxygen sensor at least 15 minutes to stabilize at ambient temperature. Electrochemical sensors in particular need thermal equilibrium to provide accurate readings, cold sensors pulled from a truck in winter will drift unpredictably.
Inspect the sensor probe and gently clean the membrane with a soft, lint-free cloth dampened with distilled water. Any dust, moisture, or residue blocks oxygen diffusion and skews calibration. Check the battery level or power supply; a weak battery can cause erratic responses mid-calibration.
Set up your calibration gases in a well-ventilated area, away from ignition sources. Secure the cylinder upright, attach the regulator, and crack the valve slightly to purge the regulator before connecting gas lines. Never rush this step, compressed gas safety is non-negotiable.
Record your initial readings: sensor serial number, current oxygen percentage, ambient temperature, and atmospheric pressure. This baseline data becomes part of your audit trail. If the initial reading deviates significantly from expected ambient air (20.9% ±0.5%), note it, you may have a fouled sensor or a leak that needs addressing before calibration proceeds.
Two-Point Calibration Procedure
The two-point calibration establishes your sensor’s accuracy across its full measurement range, giving you confidence that readings from 0% to 21% oxygen are reliable for carbon credit verification.
Start with the ambient air span point. Expose your sensor to clean outdoor air (20.9% O2) and allow readings to stabilize for three to five minutes. Modern sensors should display 20.9% ±0.3%. Record this value as your high-point reference. If the reading drifts outside this tolerance, note the exact deviation before proceeding.
Next, apply your zero-point gas. Connect your nitrogen cylinder or certified zero-oxygen gas through the regulator and flow controller. Introduce the gas into your calibration chamber at the manufacturer’s recommended flow rate, typically 0.5 to 1.0 litres per minute. Wait until the sensor displays a stable minimum reading, usually three to eight minutes depending on chamber size. This reading should be 0.0% ±0.2%.
For electrochemical sensors, calibration adjustments involve entering offset and gain values through the sensor’s interface or connected device. The offset corrects the zero point, while gain adjusts the span. Optical sensors typically use software algorithms that require you to confirm exposure to both calibration points, then automatically calculate correction factors.
Record both pre-adjustment and post-adjustment readings, along with the calibration coefficients applied. These numbers form your audit trail. If post-calibration readings still exceed tolerance limits, repeat the procedure or investigate membrane contamination and electrolyte depletion.
Recording Calibration Data for Audit Trail
Every calibration event requires meticulous record-keeping to satisfy third-party verifiers and certification bodies. Create a dedicated logbook or digital spreadsheet where you document the date and time of calibration, the technician’s name, and the sensor’s serial number. Record both pre-calibration readings (before adjustment) and post-calibration readings (after adjustment) to demonstrate the correction applied. Note the calibration gas types and their lot numbers, verifiers often cross-reference these against manufacturer certificates to confirm traceability.
Environmental conditions matter for data validity. Log the ambient temperature and atmospheric pressure during calibration, as these factors affect oxygen measurements and may explain minor deviations. If you encountered any issues, sensor drift beyond acceptable limits, equipment malfunctions, or procedural deviations, document them with explanations and corrective actions taken.
This audit trail documentation forms the backbone of your MRV chain-of-custody. Verifiers will scrutinize these records to confirm your oxygen data meets certification standards. Keep calibration logs for at least seven years, the typical retention period for carbon offset projects, and ensure they’re accessible during site audits.
Verification and Quality Control Checks
Once you complete the two-point calibration procedure, immediate verification is essential before you deploy your sensor for carbon monitoring work. A successful calibration does not guarantee accurate field performance, especially in agricultural environments where temperature swings, dust, and moisture can affect sensor behavior within hours of setup.
Begin your verification with a fresh ambient air test in open conditions away from your calibration workspace. Hold the calibrated sensor in clean outdoor air (avoiding exhaust vents, composting areas, or other oxygen-depleted zones) and let it stabilize for three to five minutes. The reading should settle at 20.9% O2 ±0.3%. If the sensor drifts outside this range immediately after calibration, repeat the entire procedure and check for membrane contamination or electrolyte depletion in electrochemical sensors.
Cross-checking against a second calibrated sensor provides critical validation for certification-grade data. Position both sensors side-by-side in identical conditions and compare readings. For QA/QC for MRV work in Canadian carbon offset programs, acceptable agreement between sensors is ±0.5% O2. Larger discrepancies signal a calibration error, sensor malfunction, or environmental interference that must be resolved before data collection begins.
Document every verification check in your calibration logbook with the same rigor you applied to the calibration itself: date, time, environmental conditions (temperature, barometric pressure), verification test results, and technician initials. Third-party verifiers scrutinize these records during audits and often request proof that sensors were field-tested, not just bench-calibrated.
Recalibration timing depends on your monitoring intensity and certification protocol requirements. Monthly recalibration is standard for continuous deployment in composting or wastewater aeration systems where sensors face harsh conditions. Quarterly intervals may suffice for intermittent soil respiration studies, but always recalibrate after any sensor relocation, extreme weather events, or if routine data checks reveal unexpected patterns.
Integrating O2 Data Into Your Carbon MRV Workflow
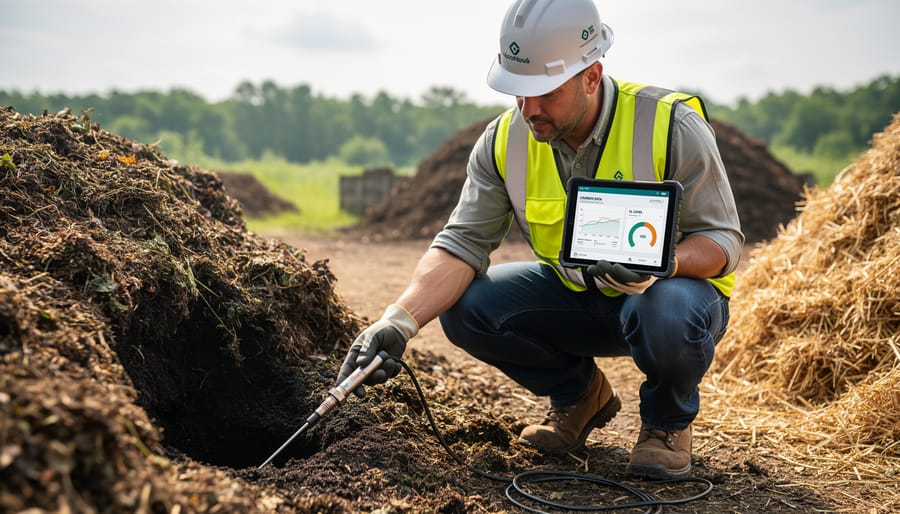
Once your sensors are calibrated, they become active data collectors in your carbon offset program. Deploy them strategically at emission hotspots: inside compost windrows to track aerobic conditions and methane reduction, along manure aeration systems to verify treatment efficiency, or in soil respiration chambers for nitrous oxide mitigation studies. Placement matters. Position sensors where oxygen depletion or fluctuation directly correlates with greenhouse gas production, ensuring your monitoring captures the behaviour that earns carbon credits.
Set data logging intervals based on verifier requirements and process dynamics. Most carbon protocols require hourly readings for composting operations and continuous monitoring during critical treatment phases in water treatment MRV systems. Fast-changing processes like forced aeration demand higher resolution. Program your loggers accordingly, balancing data quality with storage capacity and battery life.
Sync oxygen data with complementary environmental parameters. Temperature and moisture readings provide context that verifiers expect: they show whether low oxygen levels result from microbial activity (carbon reduction) or equipment failure (non-compliance). Collect these datasets simultaneously using multi-parameter loggers or coordinated manual sampling. Time-stamped, cross-referenced data strengthen your verification package and reduce auditor questions.
Prepare data packages that tell a clear story. Organize spreadsheets with calibration dates flagged, outlier readings explained, and emission reduction calculations linked to specific oxygen management interventions. Include photos of sensor placement, maintenance logs, and weather records. This documentation demonstrates the chain of custody between your calibrated instrument and the carbon credits you claim. Farms that measure and get certified using robust oxygen monitoring consistently report faster verification approvals and fewer disputed credits, translating calibration discipline into bankable environmental assets.
Expert Insight: Calibration Lessons from Alberta Carbon Projects
Jennifer Hwang, an environmental consultant who has guided fourteen Alberta farms through carbon credit certification since 2024, calibrates oxygen sensors year-round in conditions that would make most technicians reconsider their career choices. She’s learned that calibration protocols written in California don’t translate directly to a January morning in Leduc when your calibration gases freeze solid and your fingers won’t cooperate.
“Winter throws everything sideways,” she explains. “I’ve had electrochemical sensors drift 2% overnight because the probe membrane contracts in minus-twenty weather. Now I warm sensors indoors for thirty minutes before calibration, and I keep my gas cylinders in insulated cases with hand warmers tucked around the regulators. It sounds absurd until you’ve watched a nitrogen cylinder refuse to flow because the valve iced shut.”
Her calibration schedule evolved through trial and expensive error. Early projects attempted monthly field calibrations regardless of season, which proved wasteful during Alberta’s dormant winter months when most biological monitoring pauses. She now calibrates immediately before deployment in spring, mid-season in July, before fall harvest monitoring, and always within two weeks of a verifier visit. Between those windows, she runs weekly ambient air checks, twenty seconds of work that catches drift before it ruins a data set.
The toughest lesson came during a 2025 audit when a verifier questioned calibration records that listed “ambient air” without specifying the oxygen percentage assumption. “They wanted documentation that we used 20.9% as our reference value, not just ‘outdoor air,'” Jennifer recalls. She now templates every calibration log with explicit values, gas lot numbers, and temperature readings. That standardization helped her most recent client secure credits three weeks faster than projects using informal documentation.
Her advice to new participants: treat calibration like seeding, you wouldn’t skip pre-season equipment checks, so don’t shortcut sensor prep. The verifiers notice, and your credit issuance timeline depends on their confidence in your data.
Common Calibration Questions Answered
How often should sensors be calibrated for certification?
Most Canadian carbon offset protocols require monthly calibration during active monitoring periods, with quarterly checks acceptable during off-season maintenance. If you’re collecting data for third-party verification, plan on monthly two-point calibrations at minimum. Some verifiers request pre-deployment calibration plus another check midway through each monitoring campaign, especially for composting projects where sensors run continuously. Always calibrate before any certification audit and after moving sensors between monitoring locations.
Can I use atmospheric air as my only calibration point?
No. Ambient air provides the span point at 20.9% oxygen, but certification-grade work requires a two-point calibration that includes a zero or low-oxygen reference. Single-point calibration corrects for offset drift but misses span errors, meaning your sensor could read correctly at 20.9% but be wildly inaccurate at the lower oxygen concentrations you’re actually measuring in compost or manure systems. Verifiers will reject single-point calibration records.
What if my readings are still drifting after calibration?
Persistent drift signals sensor degradation, membrane contamination, or electrolyte depletion in electrochemical sensors. If drift exceeds 0.5% oxygen within 24 hours post-calibration, the sensor likely needs service or replacement. Don’t try to force repeated calibrations to correct fundamental sensor failure. Document the issue, pull the sensor from service, and contact the manufacturer. Continuing to use a failing sensor compromises your entire data set and puts your carbon credits at risk.
Do I need lab calibration or is field calibration acceptable?
Field calibration using certified calibration gases meets most MRV requirements, provided you document the procedure properly. Lab calibration becomes necessary only if verifiers question your field protocols or your sensor has been damaged.
How long do calibration records need to be kept?
Retain all calibration logs, gas certificates, and sensor serial number records for at least seven years after the monitoring period ends. Some carbon programs extend this to the full project crediting period plus three years.
What happens if a verifier questions my calibration protocol?
Verifiers may request a demonstration calibration, cross-check against their reference sensor, or require third-party lab certification of your equipment. Having detailed records, manufacturer certificates, and consistent procedures makes these requests straightforward rather than threatening your certification.
Temperature extremes common on Alberta farms complicate calibration schedules. If your sensors experience freeze-thaw cycles or summer heat above 35°C, add calibration checks immediately after temperature swings return to normal operating range. Cold-weather storage of calibration gases also matters: keep cylinders in heated spaces and allow them to reach ambient temperature before use, or pressure fluctuations will throw off your gas delivery and invalidate the calibration.
Proper oxygen sensor calibration is not a checkbox exercise. It is the foundation that keeps your carbon credit data defensible when verifiers arrive with questions and auditors review your MRV records. Every calibration you perform, every data point you document, directly protects the revenue stream your farm has worked to establish through improved management practices. One rejected monitoring dataset can delay credit issuance by months or disqualify an entire reporting period, turning potential income into wasted effort.
Across Alberta, farmers are proving that environmental monitoring does not require a lab coat or a graduate degree. You already manage complex systems, adapt to unpredictable conditions, and make data-driven decisions every season. Calibrating an O2 sensor is well within your skillset, especially when you follow documented procedures and maintain consistent records. The learning curve is short, but the payoff compounds over time as your operation builds a reputation for reliable, certification-grade data.
The carbon credit market rewards precision. Farms that demonstrate rigorous QA/QC practices earn verifier confidence, smoother certification renewals, and stronger negotiating positions with credit buyers. As more Alberta producers enter carbon programs in 2026, those who master the fundamentals of sensor calibration and data integrity will lead the next wave of agricultural climate solutions. Your attention to calibration today becomes your competitive advantage tomorrow.